Difference between revisions of "Cutaway panels in GIMP"
Mikehgentry (talk | contribs) m (→Mass production) |
Mikehgentry (talk | contribs) m (→Textures and detailing) |
||
| Line 46: | Line 46: | ||
The finished article... I wonder what it does? :-) | The finished article... I wonder what it does? :-) | ||
| − | Here I've imported another line layer from LibreCAD for extra detailing. I've duplicated it and applied a 'Gaussian blur' filter to one duplicate, and reduced opacity of both, to leave something of a defined edge without looking unnaturally sharp | + | Here I've imported another line layer from LibreCAD for extra detailing. I've duplicated it and applied a 'Gaussian blur' filter to one duplicate, and reduced opacity of both. I did the same to the original outline, to leave something of a defined edge without looking unnaturally sharp. You need to pay attention to which areas are selected when applying the blur, or the lines will bleed into the wrong surfaces. It's easy enough using a combination of the previously made paths and the master outline - Shift-click on 'Path to selection' to add to the selection, Ctrl-click to subtract. You can also use 'Grow' in the Select menu to merge separate areas together. |
== Mass production == | == Mass production == | ||
Latest revision as of 23:35, 18 March 2013
Contents
The outline
Draw your outline in another program - GIMP isn't really suited to this. LibreCAD is pretty good, Inkscape would also work. You're going to use it for selections, so make sure all the lines meet up. Leave a border - you can trim it off later if you don't want to include it in the final texture.
Import the file into GIMP. Duplicate the layer, and erase any stray lines that shouldn't be visible (useful to keep an intact backup, so you can still select the full shape of any component easily).
Once done, if you have a black or white background, turn it transparent with 'Colours' -> 'Colour to alpha'. You might want to create a blank black or white layer to put behind your outline as an editing aid to make the lines stand out - though remember to change it to a neutral colour at the end if any of it shows through.
Defining paths
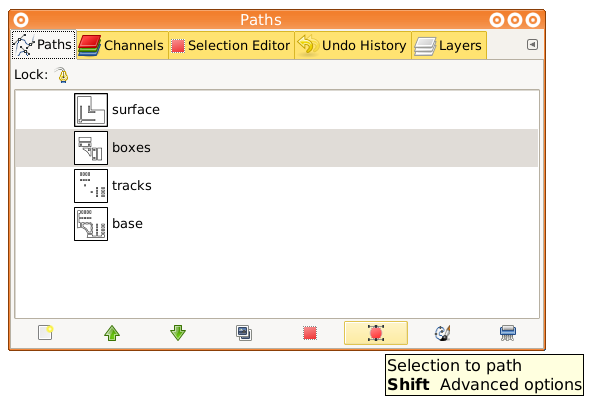
Use 'Fuzzy select' (Shift + left click to add to selection) to select a group of components that you imagine should be of the same height. In the 'Paths' dialogue, select 'Selection to path'. Repeat, until you have a path for each height group.
Drawing shadows
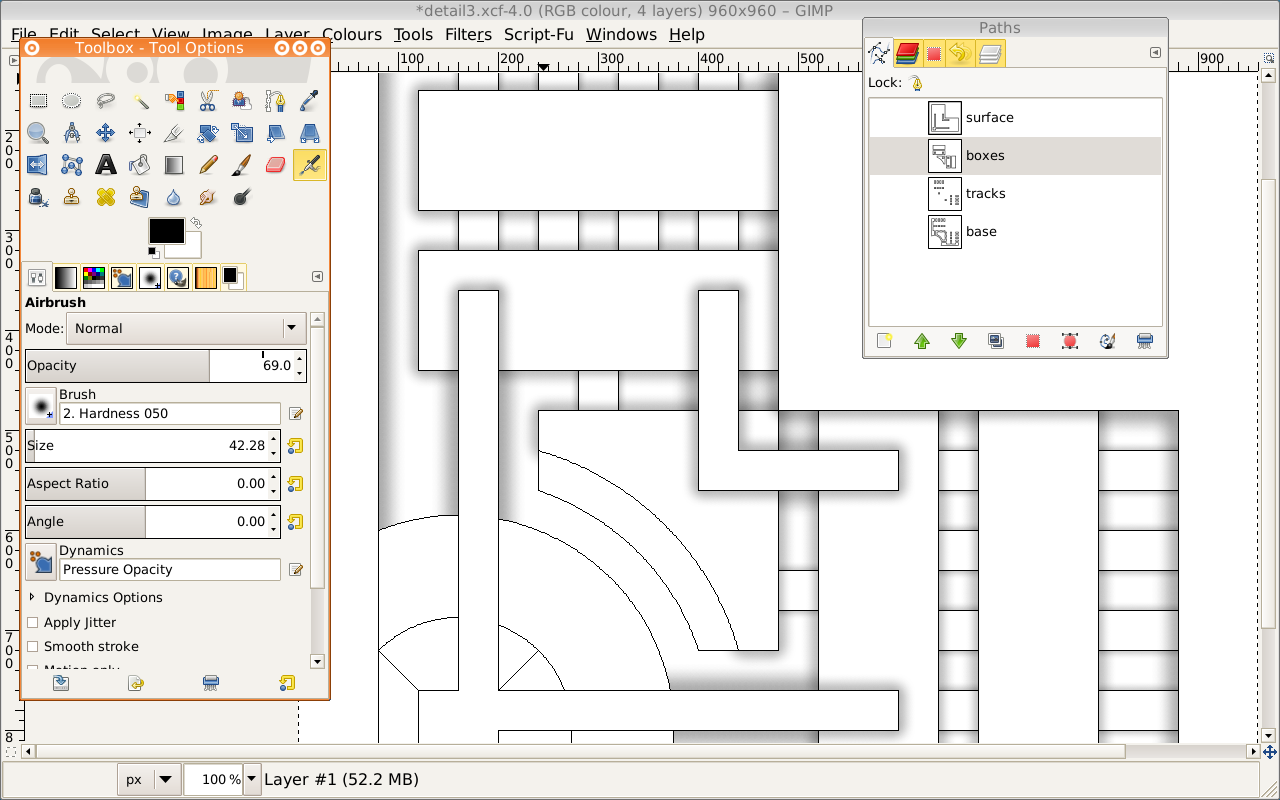
First, set the parameters for the 'Airbrush' tool so it looks like a shadow, something like black at 60 - 80% opacity, with a round brush set at a little over double the size you really want. Create and activate a new transparent layer. Select a height group's path, and choose 'Path to selection' - this limits the area we're casting the shadow onto. Select a path for a higher up height group, and choose 'Paint along the path' -> 'Stroke with a paint tool'. Choose 'Airbrush' and hit 'Stroke'.
As you can see, you've projected a shadow from one height group onto another. By adjusting opacity and width for different combinations, you can create a consistent, and reasonably convincing illusion of depth.
Angled surfaces
If you have a surface which is supposed to be angled, you'll need to create a separate layer for it's shadow. Draw a shadow on it using the same method. Right click on the layer in the 'Layers' dialogue, and choose 'Add Layer Mask' -> 'White'. Now draw a dark to light gradient across the surface, the dark part being the area of shadow you want to fade. Right click on the layer and choose 'Show Layer Mask' to view it. Play around with the gradient's intensity, position, and offset, and the layer's opacity, till it looks right.
Textures and detailing
Add texture layers beneath your shadows.
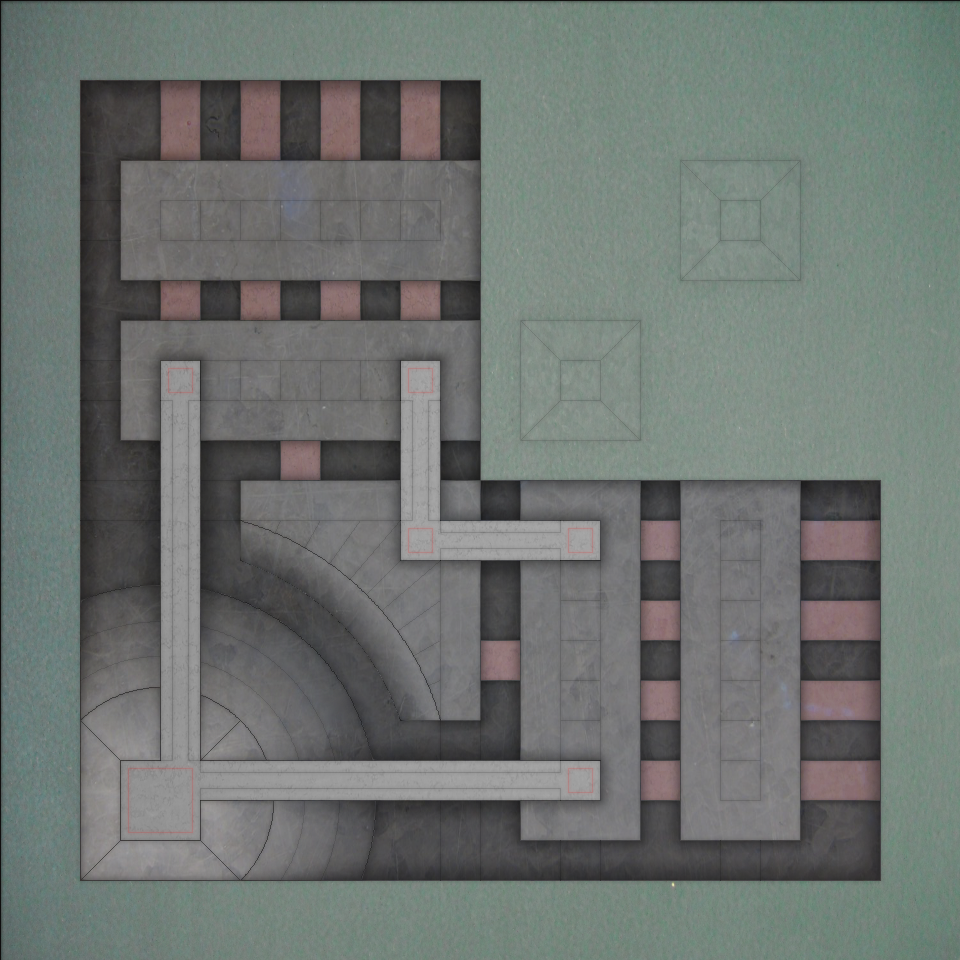
The finished article... I wonder what it does? :-)
Here I've imported another line layer from LibreCAD for extra detailing. I've duplicated it and applied a 'Gaussian blur' filter to one duplicate, and reduced opacity of both. I did the same to the original outline, to leave something of a defined edge without looking unnaturally sharp. You need to pay attention to which areas are selected when applying the blur, or the lines will bleed into the wrong surfaces. It's easy enough using a combination of the previously made paths and the master outline - Shift-click on 'Path to selection' to add to the selection, Ctrl-click to subtract. You can also use 'Grow' in the Select menu to merge separate areas together.
Mass production
Obviously such a technique lends itself to mass producing different panels in one file - that way the shadows and textures are consistent. A few things to consider:
- Colour code stuff to avoid confusion - you may well want a translucent flat grey layer over everything to shade it according to depth, and that's a good way to start off visually organising everything.
- Do the initial outlines in different height layers too - it's much less laborious to build the paths that way. Use of 'Sample merged' select mode in GIMP means the layers don't need to be complete, you can 'borrow' lines from other visible layers.
- A spreadsheet to record what values you've used for the shadows helps. In a complex image, recreating a layer through sheer guesswork is painful if you mess up...
- RAM use balloons quite quickly. For a 2400 x 2400 texture, you may be using several gigabytes once you've added a few texture layers.
Links
- See also Decoy's tutorial on machinery texture: http://www.darksaber.pnma.co.uk/tuttexture02.html


