Difference between revisions of "Model system"
(Adding the long undocumented tex_ambi texture type.) |
m (→Importing models) |
||
| (2 intermediate revisions by 2 users not shown) | |||
| Line 15: | Line 15: | ||
*For static geometry, such as buildings, OBJ is recommended, this may allow for some optimizations | *For static geometry, such as buildings, OBJ is recommended, this may allow for some optimizations | ||
| − | The only officially tested 3D modelling program at the moment is [http://www.blender.org/ Blender | + | The only officially tested 3D modelling program at the moment is [http://www.blender.org/ Blender 3.1]. For blender, a quick checklist is: |
*Coordinates: X right, Y forward, Z up | *Coordinates: X right, Y forward, Z up | ||
| Line 186: | Line 186: | ||
As at 29 January 2014. | As at 29 January 2014. | ||
Tags are only need to be present on the top level LOD, they will be visible on all LOD levels. | Tags are only need to be present on the top level LOD, they will be visible on all LOD levels. | ||
| + | These tags are mandatory for the ship to work as expected, e. g. missing tags for the camera(s) might lead to front lasers firing in the wrong direction. | ||
{| class="wikitable" | {| class="wikitable" | ||
Latest revision as of 08:45, 9 May 2022
Contents
Overview
tl;dr: a simple scenegraph-based approach that has nothing to do with the old system or Lua, focus is on easy importing, supports some animation.
Debuging models
You can access some in-game debug functionality regarding models. Wire-frame display, tag display, collision and bounding box display, among other things. Details: Model debug flags
Importing models
The import system theoretically supports many different formats but you are expected to use only some:
- When node structure, node names and animations matter, use Collada (.dae).
- For static geometry, such as buildings, OBJ is recommended, this may allow for some optimizations
The only officially tested 3D modelling program at the moment is Blender 3.1. For blender, a quick checklist is:
- Coordinates: X right, Y forward, Z up
- Always generate UV coordinates for the model
- Versions downloaded from blender.org support Collada out of the box, while the version distributed with some Linux distros doesn't.
- There is an alternative Collada exporter made by the Godot team.
The Model viewer is supplied with the game.
Model definition file
Models must be placed under data/models
To define a model, create a simple name_here.model text file along with your exported meshes:
#Comments can be written like this
#Define all used materials first
Material some-material
tex_diff some_texture.png
diffuse 0.8 0.7 0.7

#Meshes to be imported into this model, should be in the current folder
#Mixing different formats should be OK
mesh part1.obj
mesh part2.obj
Materials
Only material names are imported from 3D models, to set material properties use a small definition like this:
material CobraI_body
tex_diff CobraI_diff.png
tex_glow CobraI_emit.png
tex_spec CobraI_spec.png
tex_norm CobraI_norm.png
diffuse 1.0 1.0 1.0
specular 1.0 1.0 1.0
shininess 150
Material properties
| material | Name. Mandatory! If exporting from Blender, you can use the name of the Material as is. It's case-sensitive. (Note, in the past some exporters modified the names from what is visible in the modeling program, for example the Blender 2.6 Collada exporter adds "-material" to each name. You'll have to use this final name. If in doubt, note that both .obj and .dae files are human readable, and you can find the assigned names in them with a text editor.) |
| diffuse | Diffuse colour RGB. Default white. |
| specular | Colour of specular highlights, RGB. Default white. Set to black to disable highlights. |
| emissive | Self-illumination colour, RGB. Default black. |
| shininess | Sharpness/size of specular highlights, 0 - 128. Default 100. |
| opacity | 0-100, controls transparency of the material. A node with a material opacity less than 100 is treated as transparent, otherwise opaque. |
| tex_diff | Diffuse texture, file name (in the same folder). If you don't specify this, a white dummy texture is generated. |
| tex_ambi | Ambient occlusion texture, file name (in the same folder). Used for faking ambient occlusion, by multiplying the diffuse with this. So the darker the AO texture, the darker it will make the diffuse. |
| tex_glow | Self-illumination texture, overrides emissive colour parameter. Default none. |
| tex_spec | Specular highlight colour/intensity texture. Default none. Multiplied by specular colour parameter, so set it to white to leave control entirely to the texture. |
| tex_norm | Normal map. Default none. You can create surface detail with it, which interacts with lighting. |
| use_patterns | This material will use the pattern/colour system. Read more below. |
| unlit | No lighting, diffuse value can still be used to tint the result |
| two_sided | Removed function. Duplicate face and flip normals if needed. |
| alpha_test | Pixels with alpha value < 0.5 are discarded, this is good for fences and such. It produces sharp edges but the geometry does not need to be sorted. |
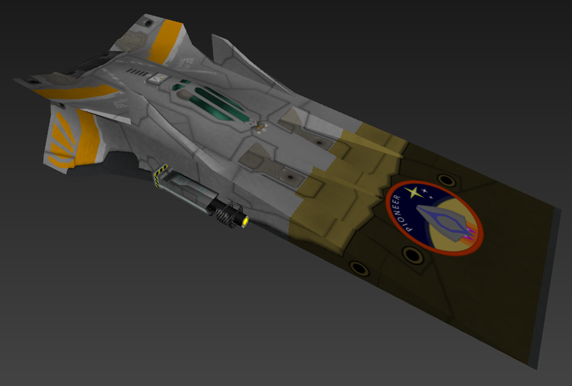
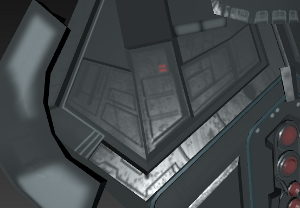 Flat specular lighting improved by a specular map
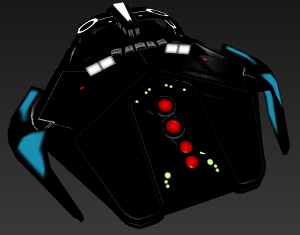 A model lit only by the self-illumination texture
Patterns
A system to mark customizable color areas on a model without splitting it to separate materials.
Patterns are small grayscale textures placed in the model folder, named pattern*.png. Using gray or white colour you can mark the areas tinted by one of the customizable colours (black marks unaffected areas). The colours are set by the game (faction-specific ship colours, shipyard UI for the player).
The value ranges are:
- 0-63: not affecting (black)
- 64-127: first color (dark gray)
- 128-191: second color (mid gray)
- 192-255: third color (light gray/white)
You can set all three channels to these in RGB, or only the L channel in HSL (Hue, Saturation, Level) to get the needed gray.
The alpha channel of the pattern defines it's transparency. It can be used for gradual changes from colored to blank, but not for gradients between different gray ranges. Useful for showing wear on the pattern, or coloring some parts more lightly. Alpha channel can be created by using a layer mask.
Antialiasing (which generates small gradients) can cause artifacts, especially at black-white boundaries. To avoid it, try lowering the contrast on problematic places. Even different grays can be used from the same range, they will indicate the same color.
The system has several limitations: it is not meant to do fine details, transitioning from one color to another is sharp and it works best with white/light textures. You'll have to experiment.
Detail levels
Meshes can be grouped into detail levels using the lod pixelsize directive:
lod 100
mesh hull_low.dae

lod 200
mesh hull_med.dae

lod 1000
mesh hull_hi.dae
mesh landing_gear.dae
A detail level will be picked if the approximate radius of the model on screen is less than pixelsize (for the highest level it does not matter as long as it's larger than the others). Use the modelviewer to find optimal sizes.
You may specify any number of detail levels in any order, they will be sorted according to size.
Shield mesh
If you name an object shipname_shield, it will be used as the shield mesh for the ship. It can be in the top LoD .dae (.obj, etc), or in a separate file, but then you have to define that .dae for the top LoD too in the .model file. If not present, then the game will generate a spherical shield around the ship.
Animations
Position, rotation and scale keyframe animation is supported. Since the Blender 2.6 Collada exporter cannot export multiple animations in one file, you will have to put it all in one timeline and split it at the import stage (this is also the only reliable way to get named animations). An animation is defined after all the meshes in format anim name startframe endframe:
anim gear_down 0 10
anim something_else 12 25
Note, Collada uses seconds instead of frame numbers. For the conversion to work, you should create the animations at 24FPS.
The game will recognize animations by name, the list of supported animations is to be decided.
Currently we support animation for landing gear (anim gear_down) and an idle loop (anim idle).
There is no animation blending, so two animations shouldn't be directly controlling the same node.
Attachments
Models may have special "tag point" nodes where other models may be attached. You may define a tag point in Blender by placing an Empty object and giving it one of the predefined names.
The system is meant for attaching equipment: guns, cargo pods, turrets...
Example: A generic gun model attached to a point "tag_gun_right":
Tag points have not been fully implemented. If you want to use this feature, please contact the devs.
Tag points
As at 29 January 2014. Tags are only need to be present on the top level LOD, they will be visible on all LOD levels. These tags are mandatory for the ship to work as expected, e. g. missing tags for the camera(s) might lead to front lasers firing in the wrong direction.
| tag_camera_front tag_camera_rear tag_camera_left tag_camera_right tag_camera_top tag_camera_bottom |
Position and orientation for the six internal view cameras. X "left", Y "up", Z "out" of the ship (in the direction the camera is facing). If one is missing, tag_camera will be used with its orientation adjusted for the appropriate direction. Camera tag scaling should be 1 on all three axes to avoid glitches. |
| tag_camera | Fallback for the specific camera tags. Useful if you don't want to specify all points. Defaults to the ship origin. |
| tag_gunmount_N | Gun positions, X "left", Y "up", Z "out" of the ship (in the fire direction). Note at this time, only N = 0 or 1 will work, and they correspond to "front" and "rear" guns in the UI. The "max_lasers" ship definition field still takes precedence (ie if max_lasers = 1, tag_gunmount_1 will never be used). Defaults to the ship origin. |
| tag_landing | A point at the lowest point of the ship with gear extended. Used during landing to make sure the ship sits at the right place on the surface. Defaults to the lowest point in the ships AABB, which is usually unsuitable because it includes the shield mesh. |
Collisions
By default, the collision mesh of a model is the bounding box of all the meshes.
For more control, name objects with the prefix "collision_" and they will be added to form a collision mesh (these objects will not be visible geometry, and the bounding box will not be generated).
Note, these names are reserved for station collision trigger surfaces:
- collision_pad1
- collision_pad2
- collision_pad3
- collision_pad4
You can also import a separate mesh using the collision directive in the model definition:
collision collision.obj
The collision mesh is separate from all detail levels, so it should be only defined once.
Decals
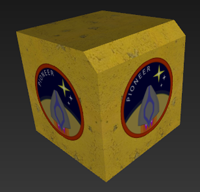
Decals are meant for customizable insignia on spaceships and changing advertisements on space stations. Up to four unique decals are available for a model (multiple identical decals are allowed). Place a piece of geometry, usually a flat quad, with proper UV coordinates and name it decal_01, 02, 03 or 04. The game will then use a special material on the geometry, or make it invisible if no decal is to be used.
Labels
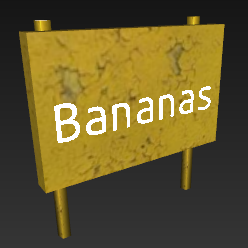
Dynamic 3D labels are meant for naming ships and space stations. Put an empty node in the model and give it a name beginning with "label". The text is set by the game at runtime if supported.
Node scale can be used as usual but the text is not constrained to the node bounds or anything like that, so some trial will be required.
You can use multiple label nodes but they will all show the same text.
Minor features
Note, these special nodes are only imported from the most detailed LOD, there is no need to duplicate them. They are rendered outside the detail level system.
Billboard lights
Simple light sprites placed using empty nodes with special naming (navlight_*). This feature will be more customizable someday, but for now the following name prefixes are recognized:
- navlight_red: blinking red light, with ships when landing gear is down, with stations constantly
- navlight_green: blinking green light when landing gear is down
any other navlight_ is blue, on when landing gear is down.
- space stations, navlight_pad<number> lights change according to landing pad reservation status
Thrusters
Thrusters are marked with dummy objects. In Blender, create an "Empty" object and point its Z-axis (change the object display type to "arrows" or "single arrow" to visualize this) where the thruster should point. Thruster size is taken from the object scale. Begin the object name with either thruster_ or thruster_linear so the importer can recognize them (linear thrusters light up only when moving up/down/left/right/forward/backward, not when turning).
Thruster colour can be modified, see: https://github.com/pioneerspacesim/pioneer/pull/3948
Internals
You can find some testcase models at git://github.com/Luomu/newmodels.git.
The internal scene graph consists of several of these nodes:
| Node | Base class. A node can have a name and one or more parents. |
| Group | A group is a Node that can have several children. |
| MatrixTransform | A Group that applies a transformation to its child nodes when rendering. |
| StaticGeometry | Contains one or more StaticMeshes. |
| LOD | Detail level control node, picks one of the child nodes based on the approximate size of the model on screen. |
| ModelNode | Can be used to attach another Model as a submodel. Use case: dynamic equipment on ships. |
| More! | Some marginal nodes that exist at the moment are:
|
MatrixTransform nodes are the most commonly used, if a geometry is rotated or scaled it will be parented to a MatrixTransform. A simple form of instancing can be achieved by adding a geometry as the child of several separate MatrixTransforms.
During rendering, the graph is traversed twice. Once for opaque objects, and once for transparent objects (which includes decals, thrusters). The model system does not perform any depth sorting, this improvement job needs to be done elsewhere.
Animations
An animation consists of Channels. Each channel controls one node (always a MatrixTransform) and has a list of position and rotation Keys. Each key has a time and value. Keys are always linearly interpolated.
At first the animations had proper play/pause/loop functionality but right now it is not so. Animation progress (and fun things like serialization) needs to be controlled directly by whatever feature uses the animation (see: landing gear).
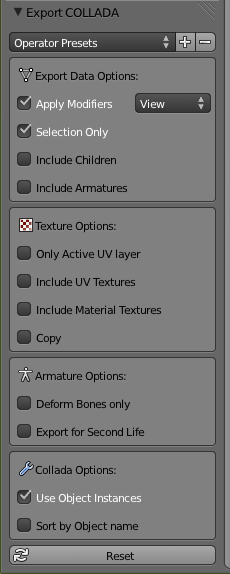
Export settings
Collada (.dae) export settings for Blender 2.6:

