Missions and the mission list
Contents
The player's mission list
Once the player has negotiated with your form, there might well be a mission in play. It could be a delivery, an assassination, a rush to tell somebody not to leave because so-and-so loves them... the possibilities are limited only by your creativity. The player needs a way to keep track of all the missions that they have agreed to undertake. Pioneer provides this through the player's mission screen, which they can access at any time using the F3 button, and looking under the missions tab. The content of this screen is controlled by some methods on the Player object, which can always be found at Game.player, and which inherits from Ship and Body. Missions are added to the screen using the Mission.New() method. It takes a table of info, and returns an integer reference to that mission, which should be stored so that it can be updated or removed later. Below follows a typical use case from the codedoc.
Create a new mission and add it to the player’s mission list while retrieving the reference number:
ref = Mission.New({
    'type'      = 'Delivery', -- Must be a translatable token!
    'client'    = Character.New(),
    'due'       = Game.time + 3*24*60*60,       -- three days
    'reward'    = 123.45,
    'location'  = SystemPath:New(0,0,0,0,16),   -- Mars High, Sol
    'status'    = 'ACTIVE',
})
In practice, it might look more like this:
local Character = require 'Character'
local Event = require 'Event'
local Game = require 'Game'
local Mission = require 'Mission'

local missions = {}

local onShipDocked = function (ship)
    if ship:IsPlayer() then

        table.insert(missions, Mission.New({
            type = "Taxi",
            client = Character.New(),
            due = Game.time + 600, -- ten minutes' time
            reward = 10,
            location = Game.player.frameBody.path, -- here, basically
            status = 'ACTIVE'
        }))
    end
end

Event.Register("onShipDocked", onShipDocked)
We don't recommend using Game.player.frameBody.path here. We're only using it because it always returns something, whether docked or not. A real mission would probably use a space station here. For this demonstration we've generated 'Taxi' missions that are already a known mission type, registered by Taxi.lua who wouldn't know about it because the mission scripts remembers it's own missions and has no way of knowing about missions registered by another module. So far no modules use another modules mission type and we only use it here for the sake of demonstration.
This creates a mission visible on the mission screen:
Registering a mission type
Before a module can create missions that are visible in the player's mission list, it needs to register a mission type. It's a painless task.
Mission.RegisterType(typeid, display, onClick)
Apart from a unique string and a translatable mission name, you have the option to pass a function that takes care of the mission info presented when you press the More info... button in the missions list. By convention, this function is named buildMissionDescription. This would typically happen at the very end of the module. Here is what it looks like at the end of DeliverPackage.lua
Event.Register("onGameEnd", onGameEnd)
Event.Register("onReputationChanged", onReputationChanged)

Mission.RegisterType('Delivery', l.DELIVERY, buildMissionDescription)

Serializer:Register("DeliverPackage", serialize, unserialize)
The next example is extended with a much scaled-down version of the onShipDocked function from the DeliverPackage module. Since these missions are recognized by a module in Pioneer already ('Taxi') they will 'probably' be handled at a later stage if we fail to remove them with this test mission. If you generate a new mission you must also handle removing it or the mission will remain in the game forever. There is no automatic logic, and no automatic removal. Your script must keep track of them. We'll wrap the action in a Timer function so we don't have to deal with the BBS form this time.
Timer:CallAt(Game.time + 2, function ()
...
end)
Start the game and have a look under the Missions tab. After 2 seconds two missions are registered. One that should be finished in 10 seconds and another with a due time set 10 seconds after the first one. There is a second timer that checks in with the missions to see how it's going after 15 seconds. One should be completed successfully and the other will fail.
local Character = require 'Character'
local Comms = require 'Comms'
local Event = require 'Event'
local Game = require 'Game'
local Mission = require 'Mission'
local Player = require 'Player'
local Timer = require 'Timer'

local missions = {}

local onGameStart = function (ship, station)
    Timer:CallAt(Game.time + 2, function ()

        -- On docking, starting a new game, we create
        -- two npc's and book them on a taxi mission.
        table.insert(missions, Mission.New({
            type = "Taxi",
            client = Character.New(),
            due = Game.time + 10, -- ten seconds
            reward = 10,
            location = Game.player.frameBody.path, -- here, basically
            status = 'ACTIVE'
        }))
        table.insert(missions, Mission.New({
            type = "Taxi",
            client = Character.New(),
            due = Game.time + 20, -- 20 seconds
            reward = 5000,
            location = Game.player.frameBody.path, -- here, basically
            status = 'ACTIVE'
        }))

        -- Magically, without moving, we've arrived at the destination
        -- after 15 seconds and check in with our passengers.
        Timer:CallAt(Game.time+15, function ()  -- 15 seconds timer
            for ref,mission in pairs(missions) do
                if Game.time > mission.due then
                    mission.status = 'FAILED'
                    Comms.ImportantMessage('We are five seconds late and I\'m at a loss of words. I had been looking forward to this ride and now my day is simply destroyed!', mission.client.name)
                else
                    Comms.ImportantMessage('Thanks for the ride!', mission.client.name)
                    mission.status = "COMPLETED"
                    Game.player:AddMoney(mission.reward)
                end
                mission:Remove()
                missions[ref] = nil
            end
        end)
    end)
end

Event.Register("onGameStart", onGameStart)
Missions Created:
1 Mission failed and 1 mission completed:
More info? If you look to the right on the mission list there is a button named More info... which will let you see more specific details of your mission. This will need to be specified in the mission script itself so if you press this button in the example above Pioneer will crash. The common name for the function you need to write in your script is buildMissionDescription. Here is what it looks like in DeliverPackage.lua.
Mission description
If you don't include the buildMissionDescription argument when you register the mission type, the mission list will not include a More info... button for the mission type. In the example above we used an existing mission type, Taxi, but we didn't do it from within Taxi.lua so when More info... is pressed buildMissionDescription will be called in Taxi.lua but it will not now anything about the mission so the function will break. Try and comment out the entire buildMissionDescription in Taxi.lua and launch Pioneer once more. The Missions will register but now without the More info... button. To register a mission type without buildMissionDescription you simply leave it out.
Mission.RegisterType('Taxi', l.TAXI)
You can also declare a minimal buildMissionDescription that returns nil. This is fine. It will include the button which, if pressed, will just exit immediately and not try and open a new window.
local buildMissionDescription = function (mission)
end

Mission.RegisterType('Taxi', l.TAXI, buildMissionDescription)
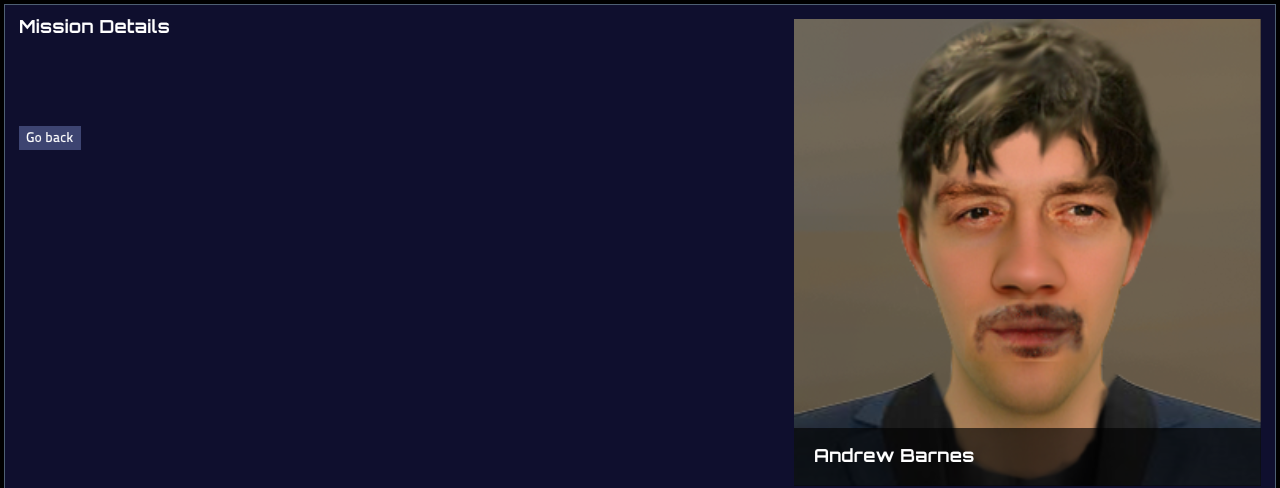
The function responsible for interpreting the mission description is drawMissionDescription() in /data/pigui/modules/info-view/04-missions.lua. It takes a table desc as it's argument. A minimal working mission description could look something like the example below. We set desc.description to an empty string and desc.details to a table with only one element false. desc.client is set to mission.client. This only works as part of an actual mission script where you already have a registered mission with a client. As you can see the Mission Details title and the Go back button are generated automatically.
local buildMissionDescription = function (mission)
    local ui = require 'pigui'
    local desc = {}

    desc.description = ""
    desc.client = mission.client
    desc.details = {false}

    return desc;
end
Let's fixup the earlier example with it's own mission type and a working buildMissionDescription.
local Character = require 'Character'
local Comms = require 'Comms'
local Event = require 'Event'
local Game = require 'Game'
local Mission = require 'Mission'
local Player = require 'Player'
local Timer = require 'Timer'

local missions = {}

local onGameStart = function ()
    Timer:CallAt(Game.time + 2, function ()

        -- On docking, starting a new game, we create
        -- two npc's and book them on a taxi mission.
        table.insert(missions, Mission.New({
            type = "Test",
            client = Character.New(),
            due = Game.time + 10, -- ten seconds
            reward = 10,
            location = Game.player.frameBody.path, -- here, basically
            status = 'ACTIVE'
        }))
        table.insert(missions, Mission.New({
            type = "Test",
            client = Character.New(),
            due = Game.time + 20, -- 20 seconds
            reward = 5000,
            location = Game.player.frameBody.path, -- here, basically
            status = 'ACTIVE'
        }))

        -- Magically, without moving, we've arrived at the destination
        -- after 15 seconds and check in with our passengers.
        Timer:CallAt(Game.time+15, function ()  -- 15 seconds timer
            for ref,mission in pairs(missions) do
                if Game.time > mission.due then
                    mission.status = 'FAILED'
                    Comms.ImportantMessage('We are five seconds late and I\'m at a loss of words. I had been looking forward to this ride and now my day is simply destroyed!', mission.client.name)
                else
                    Comms.ImportantMessage('Thanks for the ride!', mission.client.name)
                    mission.status = "COMPLETED"
                    Game.player:AddMoney(mission.reward)
                end
                mission:Remove()
                missions[ref] = nil
            end
        end)
    end)
end

local buildMissionDescription = function (mission)
    local ui = require 'pigui'
    local desc = {}

    desc.description = ""
    desc.client = mission.client
    desc.details = {false}

    return desc;
end

Mission.RegisterType('Test', 'Test', buildMissionDescription)
Event.Register("onGameStart", onGameStart)
That's basically it. Here follows a description of the elements you can add to buildMissionDescription. Try and expand our latest script on you own.
desc.description
This is a string and will typically be based on the conversation from onChat.
desc.description = "String to be shown on top of the mission description goes in here!"
desc.client
Takes a character as it's input and usually this means the character passed via the mission argument.
desc.client = mission.client
desc.details
This is a table that is passed to textTable.draw() in data/pigui/libs/text-table.lua.
desc.details = {
    {"data here", "more data"},
             ...
}
string
A string will be presented in the form of a header with a delimiter underneath.
"Just a string",
table
A table that takes strings and data/numbers in a key/value sort of way. Only one post in the table will cause a crash and any number of entries above the first two will be discarded.
  {"Left","Right"},
  {"Data", 42},
--{"This entry would cause a crash"},
  {"No crash", ""} -- Two entries in the table with one being just an empty string works.
}
spacing
The key word false can be used to insert some padding.
false,
desc.location
Add a button to set the mission location as navigation target.
From the CargoRun module:
desc.location = mission.location
desc.returnLocation
Add a button to set the return location as navigation target.
From the CargoRun module:
desc.returnLocation = mission.domicile
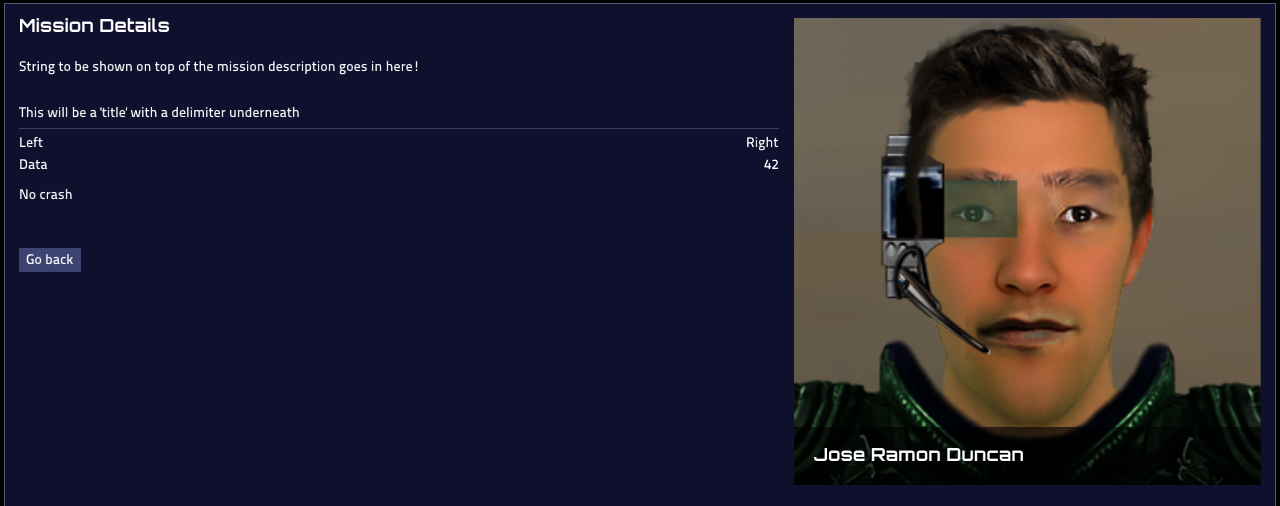
Example
local buildMissionDescription = function (mission)
    local ui = require 'pigui'
    local desc = {}

    desc.description = "String to be shown on top of the mission description goes in here!"

    desc.details = {
        "This will be a 'title' with a delimiter underneath",
        {"Left","Right"},
        {"Data", 42},
        false, -- some space.
     -- {"This entry would cause a crash"},
        {"No crash", ""}
    }

    desc.client = mission.client

    return desc;
end
Maintaining immersion
Fictionally, of course, the bulletin board is visible to any and all ships that dock at the space station, not just the player. It is important that bulletin board missions are not all scaled to the capabilities of the player. Delivery missions with unreasonable deadlines should not be ruled out. Neither should cargo missions requiring much more cargo space than the player's ship has, or combat missions for which the player is completely unqualified.
These missions should deal with the player gracefully; either allowing them to fail, and providing consequences, or preventing them from being given the mission.
It's also important, if your script serves many instances of a mission, to periodically clear away bulletin board adverts and place new ones. Not just those with obvious time constraints, but any others; the assumption that the player should make is that perhaps some other character has taken these missions.


